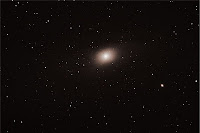
It is not always easy to get success on a chosen subject in my case the Andromeda Galaxy has been a steep learning curve and I am still learning how to get better images. So let me share my latest attempts at capturing a better image of this wonderful Galaxy.
In Part 1 of Lets do Astrophotography NOW I describe how I go about setting up for an evenings astrophotography so to continue on from this I have had a few changes to my set up.
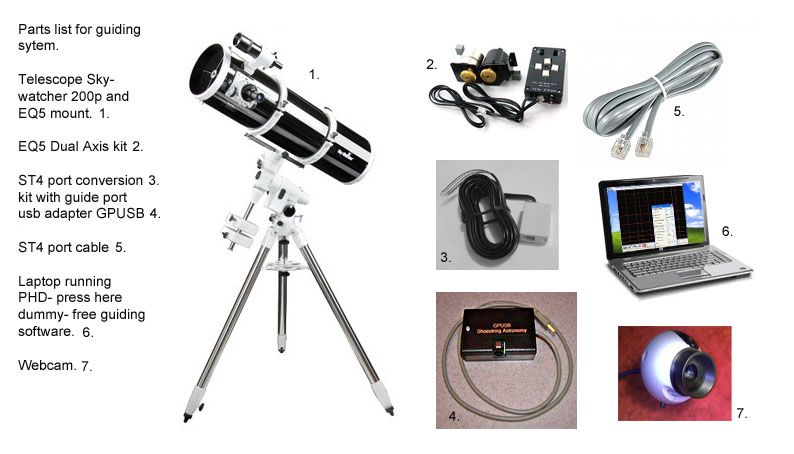
First of all a new camera well second hand and from eBay for 130 quid body only the Canon 350D.
I bought this camera because it has a very good reputation as a fine camera for astrophotography and for 130 quid you cant go wrong.
Along with the camera I bought a T Ring for 10 quid that simply screws onto where the lens normally goes then attaches to a T Adapter that goes into the 2inch eye piece hole on my telescope.
So armed with my new camera I chose a good crisp clear night to photograph M31. Now I must stress this point to you if your want to avoid disappointment. A dark site with a good clear night is a must for M31. If the moon is out or its slightly foggy or you have bad light pollution you will get poor images with little detail so make sure you choose a good night and get away from light pollution if you can.
Now I do not have a camera timer yet so I had to stick to 30 seconds for the exposure time and an ISO of 16000. Not ideal but I also varied this and took several shots at 10 seconds to give me a variety of shots to work with. The total amount of shots taken was 38 then the lid was put on the telescope and I took a fur
ther 23 Darks. That was all no Flats or Offsets this time.
The camera was set so that the 10 second timer was fired every time I pressed the button to reduce camera shake or telescope vibration which worked well.
It is vital that you zoom in on the images to check that you are not getting any blurring or trailing if you are then refocus using the Bahtinov Mask and if nessecerry adjust your weights on the telescope ie move them back slightly so the motor controlling the single axis drive can bite home.
Check again if all is well proceed with your shots.
Ok having collected my photos or subs as they are called we move on to the next stage which is to stack the images in Deep Sky Stacker available for free
here
To help you avoid any pro
blems I suggest you follow the setting I used which are as follows.
Under stacking parameters.
Result:
select "standard mode" leave EVERYTHING else blank.
Comet:
standard stacking
Light:
Kappa-sigma-clipping
kappa set to 2.00, number of iterations set to 5.
Every thing else blank.
Dark:
select "median"
Tick "hot pixel detection
"
everything else blank.
Flat:
select median
Bias/offset:
Median
Alignment:
Automatic
Intermediate files:
Tiff
Cosmetic:
Select both detect ho
t and cold pixels.
Set hot and cold filter size to 1px.
Hot detection threshold I use 83%.
Cold detection threshold 50%
Everything else un selected
Output:
Should be ok as default settings.
In register settings, use 10% star detection threshold.
(Many thanks to Stargazers lounge member for this by the way)
Ok so now we are ready to stack those images.
Select all the one
s of M31 and add them first then all your Darks and add them follow the standard instructions its not hard to do and stack them.
Now go make a cup of tea or take the dog for a walk while it gets busy on your images it takes a while.
Hopefully when you come back your final stacked image will look something like this...
Horrible right but wait.. this is not the end you have to do much more to the image. SO it will be saved as an Auto save file in the folder your images are in now you must edit this stacked image in Photoshop. I use photo shop if you dont have it you will have to look at another package like Gimp which is free but Photoshop is the best sorry but it is OK.
SO now on to Photoshop to edit this stacked image of m31. Open up the image in photoshop and we shall begin..
Step one is using levels and the Historigram.
Step two is using curves to stretch out the image more and bring out that fine detail
Step three is using filters like unsharp en Gaussian blur and gradient tool plus the use of layers and blending modes all of which takes time a practice to learn.
But help is at hand
Here is a selection of helpful links to tutorials for all of these methods all you have to do is look at them and learn them by practicing them. If your new to Photoshop start with learning all about adjusting levels and understanding how to use the Historigram then move on to curves then layers blending modes and the rest. Practice and it will become second nature. Here are those links for you to go to you will find them at the stargazers lounge in the imaging section here have also added a load more that I put together myself just look further up the blog you will find them..
So after I had loaded the image in Photoshop I used levels and curves to bring out all the detail then adjusted the colour saturation and applied a gentle unsharp filter. Finally after about an hours worth of image editing I got the result I was after and this was my picture of M31.


Comments
Post a Comment